What is ComfyUI Workflow App?

ComfyUI Workflow App = ComfyUI Workflow + Custom Nodes + Models
As a creator, when we develop workflow app using ComfyUI, what do we need to consider?
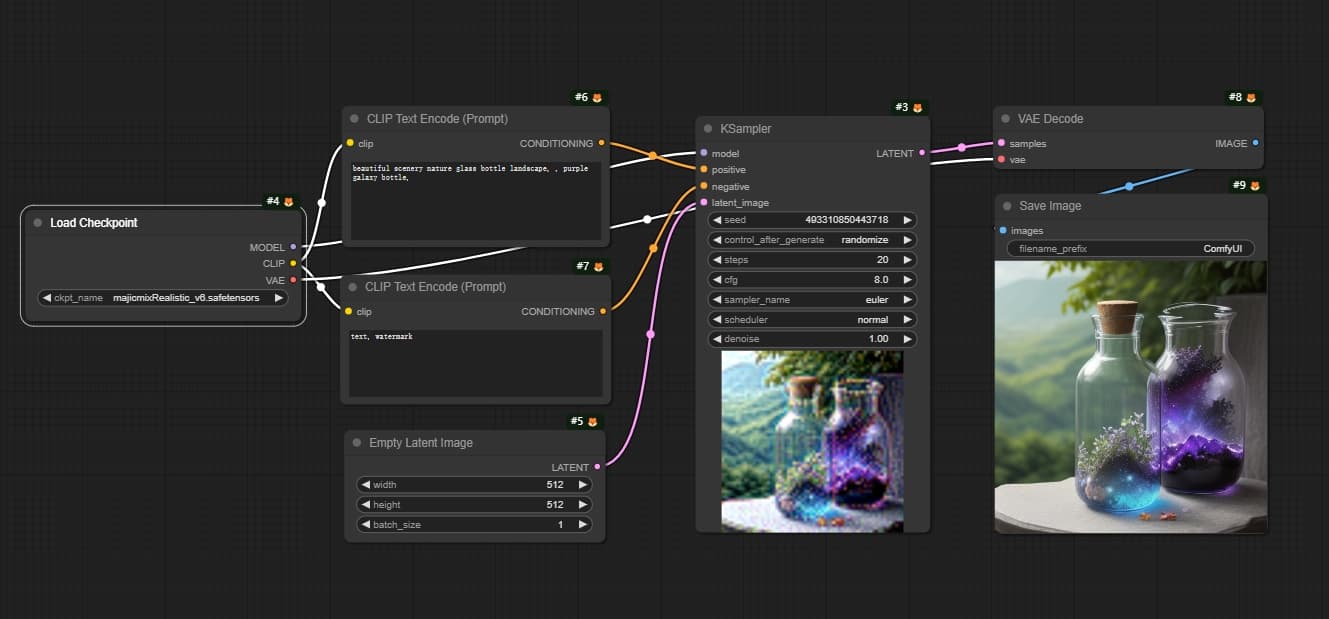
The picture below shows the default workflow for ComfyUI. Using this workflow as an example, the first step is the model node, where a Stable Diffusion model with a realistic painting style is loaded. Next, there's a node for configuring model parameters, such as positive prompts, negative prompts, image resolution, as well as nodes for the image sampler and image encoder. Finally, it outputs an image.

As mentioned earlier, when developing workflow applications with ComfyUI, besides setting up the ComfyUI environment, we need to consider:
- Which models to use? download these models from Huggingface or Civitai.
- What nodes or custom nodes to use? Apart from model configuration nodes, we can also use nodes to process the generated images, like enlargement, filters, etc.
- Combining multiple models and nodes to create a complete application scenario, like generating movie posters, creating portrait photos, and so on.
In practice, we've found that creators spend a lot of time installing ComfyUI, downloading models, setting up custom nodes, and regularly updating the ComfyUI environment and custom nodes. They might also run into conflicts between different custom nodes, which isn't really their forte.
Some teams have dedicated operations engineers to maintain the ComfyUI environment, but many creators still have to learn on the fly.
To help with this, ComfyFlow offers a hosted ComfyUI environment that comes pre-loaded with a wide range of image and video models, as well as commonly used custom nodes. This lets creators focus on developing the workflow itself.
For more information about how to use ComfyFlow, go to our website